

There are a lot of great reasons to choose Shopify for your eCommerce store. This powerful but easy-to-use platform often becomes the top choice of the first-time startup initiators because of its in-built eCommerce development features and the high level of customization. However, despite all the ease Shopify comes with, connecting an eCommerce payment gateway is a task you have to cope with on your own.
That’s why in this article, we are going to explain how to integrate shopify payment gateways into your store.
What Is a Payment Gateway?
To put it simply, a payment gateway is a financial data transfer technology that enables the process of paying for goods and services on the web. There are several Shopify payment options you can choose from – for example, PayPal, Stripe, and other popular financial services.
Also, Shopify comes with a Shopify Payment engine in-built, so you can avoid the payment gateway integration headache. However, giving your customers the opportunity to pay for your items in the way they prefer to pay is one of the pillars of a seamless shopping experience, so let’s find out how to create an ecommerce website with a payment gateway in seven steps.
How to Integrate Payment Gateway in Shopify
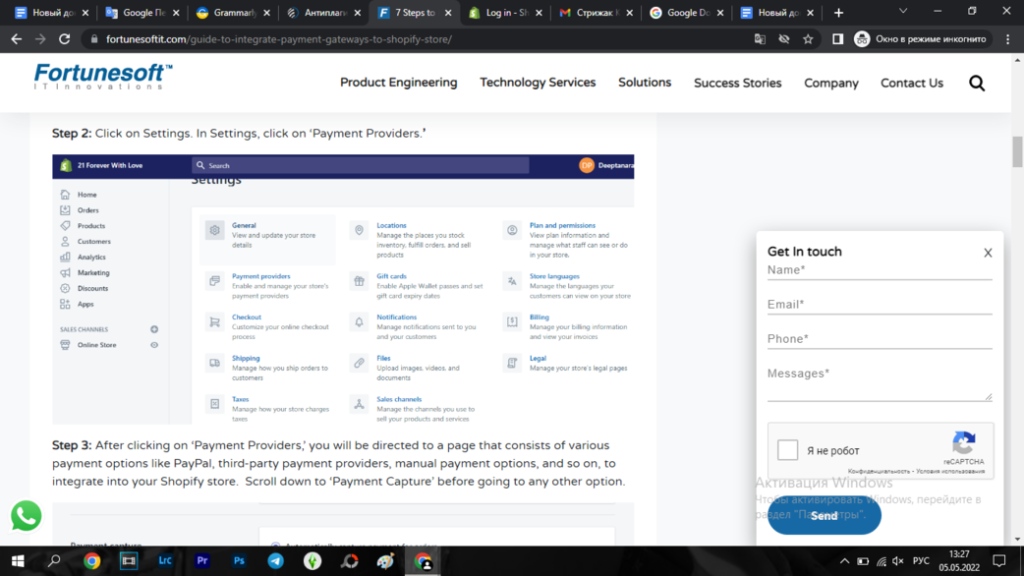
- To add various payment options, you need to log in to your Stores. After you open the Shopify panel, you need to go to the “Settings” section, which is located at the bottom of the left part of the page.
- When you go to the “Settings” section, you need to select the “Payment Providers” section.
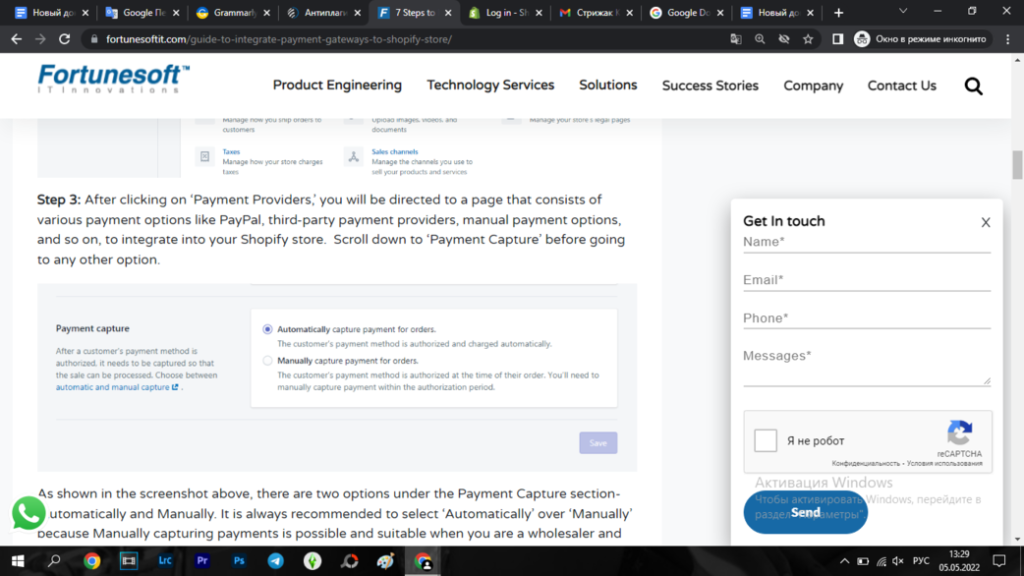
- By clicking “Payment providers” you will go to a page where there will be various payment methods. Scroll down the page to “Payment Capture”. Please note that “Payment Capture” has two options. That is, you can choose “Automatically” or “Manually”. Such an option as “Manually” is not the best one. But if you are a wholesaler and there is a need to wait for payments, then select this option. Choosing “Automatically”, in turn, allows for staying better protected from online fraud.
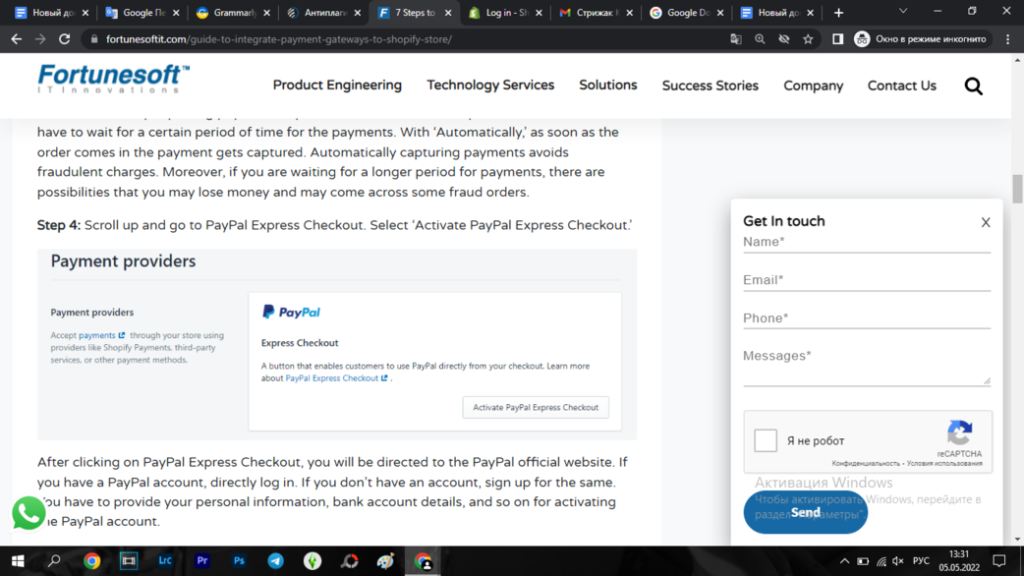
- Go to the PayPal Express Checkout section and click to activate it. After that, you will be taken to the official website of the payment system. If you do not have a PayPal active account, then you need to go through a simple registration process. To do this, you should provide personal information, connect your bank account, and verify your phone number. After that, you will need to activate your account.
- Go to the “Third-party providers” section. After clicking on this section, you will be taken to a page where all third-party providers will be listed. You need to choose from those offered.
Let’s look at the example of the 2Checkout provider. After you select this system, you will receive instructions on how to set up your account and what to do to activate it. You will also need to create a Secret Word, which will also need to be specified in the appropriate section.
The next section involves selecting payments using credit cards. For example, you can choose Visa, Mastercard, American Express, and so on. The next stage involves “Test Mode”. As you understand, at this stage, you can check all previous settings. Testing the payment gateway is an opportunity to make sure that all settings have been made correctly and that payments will be accepted. 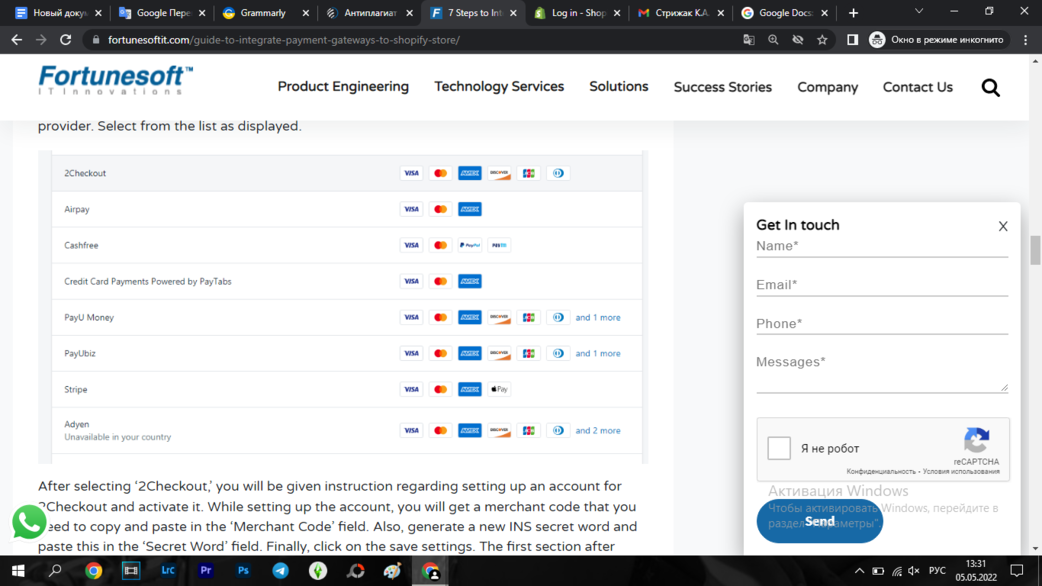
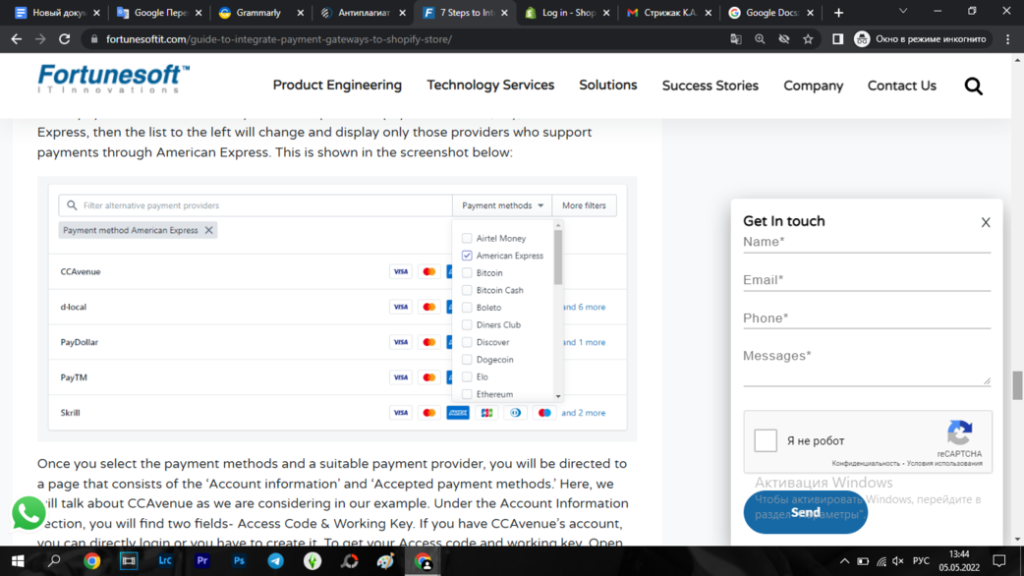
- Click “Alternative Payment Methods”. You will receive a list of alternative payment options, for example, BitPay or Coinbase Commerce. You can filter alternative options using the “Payment Methods” section. If any options are not available for your country, this will be indicated. Then follow the instructions to activate an alternative payment system.
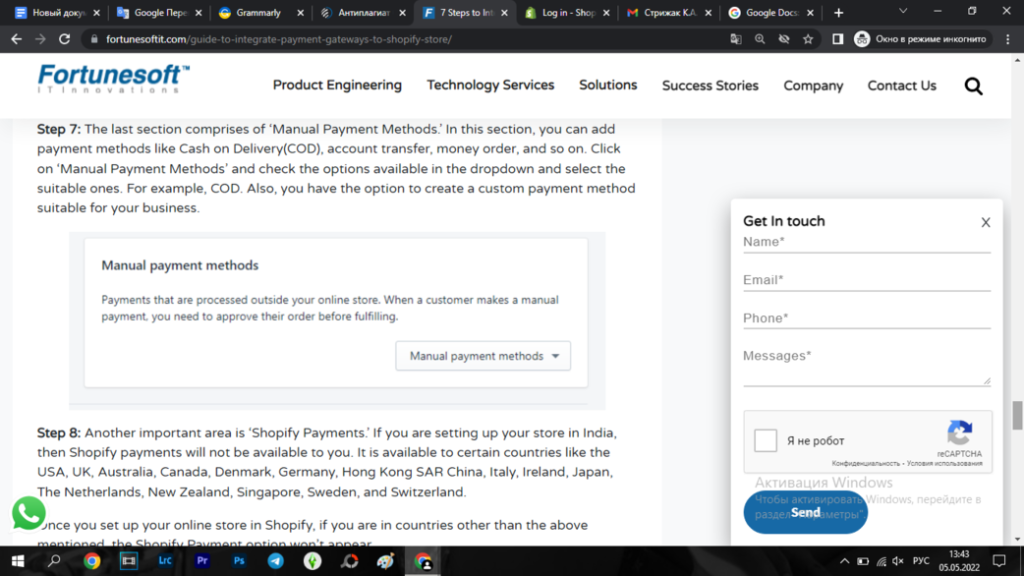
- The last section of settings consists of “Manual Payment Methods”. In this section, you can set up such payment options as COD, money order, and so on. All you need to do is to look through the possible payment options in this way and choose the ones that suit you. It is also possible to create your own payment method that suits your business.
Conclusion
Adding payment integrations to a Shopify store isn’t so challenging. Being one of the user-friendliest eCommerce development platfroms, Shopify did its best to ensure a seamless business process. However, if you feel like having some stumbling blocks, consider getting in touch with our developers for instant support!


![How to Start an Online Clothing Store [Step-by-Step Guide]](https://ideainyou.com/wp-content/uploads/2022/10/alyssa-strohmann-TS-uNw-JqE-unsplash-3.jpg)